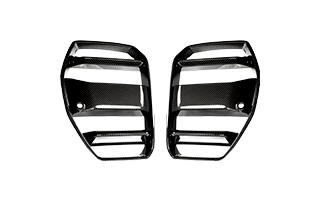
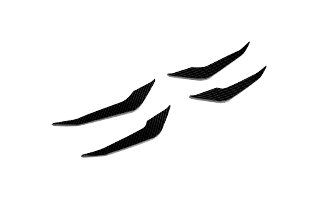
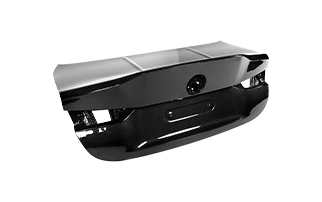
Table of contents

RevoZport BMW M5 G90 / G99 Street Program – Showing the M5’s Real Potential

Street
M5 G90 and G99 from different angles on the road

The RevoZport BMW M5 G90 & G99 Street Program is a complete dry carbon fiber body kit for both Sedan and Touring models. It enhances the M5’s visual aggression while respecting BMW’s original body lines, delivering a confident street presence without widebody proportions or race-only design.

Power, size, and performance are all there.
But visually, the car does not show enough M DNA.

It’s a big car—almost too clean.

Too calm for what it really is.

The RevoZport M5 G90 / G99 Street Program was designed to change that—not by breaking BMW’s design, but by showing what the M5 was always capable of.

M5G90 Sedan and G99 Touring Carbon Fiber Kit Showcase

Why the M5 Needed This Kit

The modern M5 is driven by everyone.
It’s a business car, a daily car, and a performance car at the same time.

That balance is impressive—but it also makes the car visually safe.

BMW deliberately holds back.
And that restraint creates space.

Space for brands like RevoZport to step in and finish the story.

The Street Program exists for one reason:
To give the M5 the aggression and presence it deserves, without turning it into something fake or overdone.

Respecting BMW’s Body Lines

At RevoZport, everything starts with respect for the original car.

The BMW M5 has strong body lines—especially the shoulder line that defines its width and authority. That line gives the M5 its confidence.

We never break that line.
We work around it.

Before designing anything, we ask one simple question:

What can this car really handle visually?

Only then do we add parts.

G99 Touring Carbon Fiber Kit Front View

Designed With BMW, Not Over BMW

We don’t design over BMW.
We design next to BMW.

BMW designs one car for everyone, which means they intentionally leave room—not because they can’t go further, but because they have to remain balanced across markets and use cases.

That space is where RevoZport works.

In practice, that means:

  • finishing what feels unresolved

  • pushing design one step further

  • revealing what BMW deliberately left open

The goal is not to shock.

The goal is to make the car feel right.

What This Means on the Road

Design decisions only matter if they work outside of controlled conditions.

For the M5 Street Program, that means:

  • surfaces that look correct at real viewing angles

  • proportions that make the car feel lower and wider without exaggeration

  • parts that integrate naturally into daily driving environments

The result is a design that feels intentional every time you see the car—not just in photos.

Engineering First: Why the Street Program Works in the Real World

A Street Program only works if it survives daily use.

That goes beyond visual balance.
It comes down to tolerances, mounting logic, and materials that behave predictably over time.

The RevoZport M5 G90 / G99 Street Program is developed with real-world use in mind:

  • consistent panel gaps

  • repeatable installation results

  • materials that hold shape through temperature changes

  • surfaces that age correctly rather than distort

This is why the kit relies on OEM mounting logic and avoids unnecessary structural changes.

The goal is not complexity—it’s reliability.

G99 Touring Carbon Fiber Front Lip Detail Showcase

Making a Big Car Feel Aggressive Again

The M5 is a large car.
So aggression has to be controlled.

Visually, the focus was clear:

  • Lower the perceived center of gravity

  • Widen the stance without overhang

  • Add presence without noise

Not extreme.

Not loud.

Just confident.

This is controlled aggression—the kind that fits an M5.

Fixing What Felt Unfinished

Rear View Angle of G99 Touring Carbon Fiber Kit

Rear Design

The OEM rear diffuser looks flat and visually disconnected.
On a car this large, it leaves the rear feeling incomplete.

The Street Program diffuser closes the center gap and visually connects the rear, giving the car a planted and intentional stance.

The spoiler follows the same logic:

  • not oversized

  • not decorative

  • just enough to balance the car

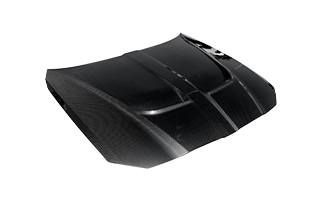
  • G90 Sedan Carbon Fiber Hood Detail

Front & Hood

At the front, the hood plays a critical role.

The dry carbon hood adds tension and sharpness, making the front feel lower and more serious—without turning the M5 into a race car.

Combined with the front lip and bumper details, the front finally reaches its full potential.

Why Dry Carbon Fiber Matters on a Car Like the M5

On a large performance sedan, material choice is not cosmetic.

Dry carbon fiber allows precise control over:

  • surface sharpness

  • edge definition

  • long-term dimensional stability

The Street Program uses Toray 2×2 woven dry carbon, selected for consistency and repeatability across all components.

This ensures:

  • uniform weave alignment across the full kit

  • crisp transitions that match BMW’s factory surfacing

  • a finish that looks designed rather than added

On a car this size, those details define whether the result feels aggressive—or forced.

G90 sedan rear spoiler and G99 touring roof spoiler

One Program for Sedan and Touring

The BMW M5 G90 Sedan and G99 Touring were designed together.

Because an M5 should look like an M5—regardless of body style.

All Street Program components fit both models, with one distinction:

  • G90 Sedan: trunk spoiler

  • G99 Touring: roof spoiler

Everything else stays the same.

Clean. Logical. Consistent.

RevoZport BMW M5 G90 / G99 Street Program Parts List

The RevoZport BMW M5 G90 / G99 Street Program includes:

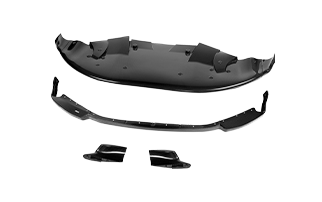
Front

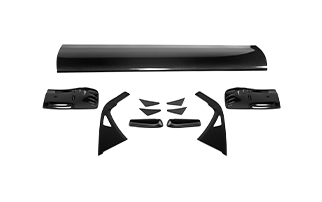
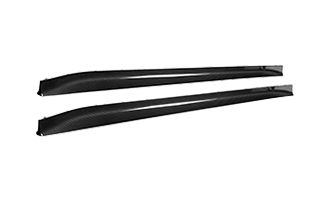
Side

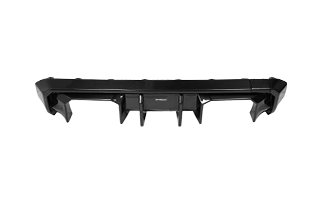
Rear

All components are produced in dry carbon fiber using Toray 2×2 woven carbon, finished consistently across the full kit.

Fitment & Installation

All components are designed for street use and utilize OEM mounting points:

  • plug-and-play installation

  • no cutting

  • no permanent modification

This ensures predictable fitment, clean alignment, and long-term reliability.

Professional installation is recommended—not because the kit is difficult, but because finish quality matters at this level.

Two personnel installing the front lip of the carbon fiber component on the vehicle

Is the RevoZport M5 Street Program Suitable for Daily Driving?

Yes—that is exactly the point.

The Street Program is developed for:

  • daily road use

  • OEM ride height compatibility

  • real-world driving environments

There are no widebody conversions, no track-only components, and no irreversible modifications.

The result is a car that feels more aggressive every day—not just in photos.

Showing the M5’s Real Potential

BMW always leaves space.
That’s not a weakness—it’s an opportunity.

The RevoZport M5 G90 / G99 Street Program sits exactly in that space.

It doesn’t change the M5.
It shows what it can really be.

Conclusion

The design works not when people say:
“Crazy aftermarket bodykit.”

But when they think:

This is how the M5 should look.

That’s when the Street Program does its job.

0 comments

Leave a comment

You Might Also Like To Read

Tesla Model 3 Body Kit Guide
Tesla

November 04, 2026

Tesla Model 3 Body Kit Guide: Choosing Carbon Upgrades for 2018–2020

For a Tesla Model 3 body kit that preserves the car’s clean shape, start by planning the front lip, side skirts and rear diffuser together. These parts define the lower outline across the whole car. Fender flares, a carbon hood and a replacement trunk lid serve more specific goals. The six RevoZport components discussed here fit the first-generation, pre-facelift Model 3 Sedan from 2018–2020. Your choice depends on how much of that original shape you want to change. Among exterior Tesla Model 3 mods, a defined lower edge offers a restrained starting point. Fuller wheel arches or exposed carbon panels create a more pronounced result. Each direction deserves its own reason for being part of your build. What Can a Body Kit Change on a 2018–2020 Tesla Model 3? A body kit can define the Model 3’s lower outline, emphasize its wheel arches or change the shape and finish of larger panels. These changes affect different views of the car. The original Model 3 has smooth surfaces and relatively little exterior detailing. That gives added edges and exposed carbon a noticeable role. A front lip draws attention below the bumper; a sculpted hood changes a much larger surface above it. The six components fall into three groups: Styling Goal Main Components Area of Change A lower, more continuous outline Front lip, side skirts and rear diffuser Lower front, sides and rear Fuller-looking wheel arches Fender flares Outer wheel-arch contours More sculpted surfaces and carbon contrast Hood and trunk lid Larger front and rear panels How do you want your Model 3 to look when you step back and take it in? Small carbon details and full exposed panels create very different levels of visual change. You may find that a sharper lower edge gives the car exactly the presence you had in mind. For that look, we recommend the front lip, side skirts and rear diffuser while retaining the original hood, trunk lid and wheel-arch contours. Together, these three parts create a continuous lower outline and can form a complete exterior upgrade on their own. Why Start with a Front Lip, Side Skirts and Rear Diffuser? These three parts create a connected lower outline while retaining the Model 3’s main body surfaces. They are our recommended starting point when you want a coordinated exterior upgrade. Their value comes from how each part continues the treatment around the vehicle. The front lip establishes the lower edge, the skirts extend it through the profile, and the diffuser gives it a defined finish at the rear. A Front Lip Gives the Nose a More Defined Lower Edge RevoZport’s front lip extends along the factory bumper’s lower edge toward both sides. Its sculpted ends add depth around the corners, giving the smooth front a more pronounced base. That combination emphasizes visual width and makes the nose appear lower. The carbon surface also creates a distinct boundary beneath the painted bumper, so the change stays concentrated in one area. A front lip makes sense as a first component when the front view is your priority. You can retain the familiar upper surfaces while giving the lower bumper more definition. Its installed position should also suit the ramps and driveway approaches you use daily. Side Skirts Connect the Front and Rear The side skirts extend the horizontal line beneath the doors. This gives the profile a longer, lower appearance and carries the carbon treatment between the front and rear. Their value becomes clearer when you imagine the car with a front lip and diffuser already fitted. Those two ends gain depth, while the standard side remains visually unchanged. Side skirts bring the middle of the car into the same design. For a complete lower-body project, we would plan them alongside the front and rear pieces. The effect comes from the extended body line; suspension height remains a separate choice. A Rear Diffuser Adds Depth Below the Bumper The rear diffuser introduces a more sculpted surface beneath the bumper, with fin-like elements that add a motorsport-inspired appearance. It gives the lower rear more depth than a simple strip of carbon trim. This makes it useful when you want the rear to carry similar visual emphasis to the front lip. The side skirts then connect those two areas when you view the car from an angle. You can also choose the diffuser independently when the rear bumper is your main focus. The three-piece recommendation is a styling plan, with room to build in stages around the view you want to change first. Are Fender Flares Worth Adding to Your Model 3 Build? Fender flares are worth considering when fuller wheel arches are part of your intended look. They add visual volume around the wheels, taking the build beyond a defined lower outline. For an owner who prefers the original wheel-arch contours, the front lip, skirts and diffuser may already provide enough change. More Visual Volume Around the Wheel Arches The Tesla Model 3 carbon fiber fender flares cover the outer wheel-arch area and give it a broader, more sculpted appearance. They shift attention toward the wheels and the surrounding bodywork. This can suit a build with a more assertive wheel design and a deliberate stance. The flares add carbon detailing higher on the body than the skirts, so their effect remains visible around each wheel. Consider that change from both the side and a front three-quarter angle. A fuller arch may be exactly what you want, or it may add more visual weight than your otherwise restrained exterior needs. How Should Fender Flares Work with Your Wheel Setup? Plan the flares and wheel position together so the fuller arches suit the stance you want. From the side, the added carbon emphasizes the arch shape; from a front three-quarter view, the position of the wheels beneath that outer edge becomes more noticeable. For a build that includes new wheels, we recommend settling the flare choice before finalizing wheel width and offset. The installed arch contour helps establish the intended appearance, while the original fender, inner liner and clearance through steering and suspension movement determine which wheel and tire setup can fit. Our recommendation is to add flares when you want the wheel arches and stance to become a defining feature. If you prefer the original arch contours and mainly want a sharper lower outline, choose the front lip, side skirts and diffuser as your complete exterior combination. What Do a Carbon Hood and Trunk Lid Add Beyond Lower-Body Upgrades? A carbon hood and trunk lid introduce larger sculpted surfaces and stronger material contrast. They suit owners who want the front or rear panels themselves to become part of the exterior design. The decision is more substantial than extending a bumper edge. You are choosing how much exposed carbon and panel shaping you want across the upper body. A Sculpted Hood Changes the Front Surface The RevoZport hood uses raised longitudinal lines to give the front panel more depth. These contours create a more muscular surface than the original smooth hood, while exposed carbon contrasts with the surrounding paint. Its effect is especially relevant from the front three-quarter view, where you can see both the panel’s shape and its relationship with the fenders. A front lip emphasizes the bottom of that view; the hood becomes a larger focal point above it. Choose the hood when that upper surface is central to your build. The Model 3’s front storage compartment sits beneath it, so panel fit and normal opening and closing remain part of the installation plan. A Replacement Trunk Lid Creates a More Integrated Rear The Tesla Model 3 carbon fiber rear trunk replaces the trunk lid as a complete exterior component. Its appeal lies in the carbon surface and the way the rear edge forms part of the panel. Compared with adding a small spoiler to the original lid, this approach changes more of the rear’s material and shape. It suits a project where you want the trunk surface and trailing edge to read as one design. The diffuser addresses the area below the bumper. A replacement trunk lid adds a separate focal point higher up, giving you another way to shape the rear view. Choose Each Panel Around the View You Want to Change You can select the hood or trunk lid independently. Prioritize the hood for a more sculpted front surface, or the trunk lid for a more extensive carbon treatment at the rear. Both make sense together when exposed carbon panels are part of the overall concept. For a restrained lower-body build, retaining the factory panels remains a coherent choice. Professional fitting should address alignment, secure latching, opening behavior and sealing. Those functions belong in the installation plan for any complete replacement lid. Which RevoZport Model 3 Parts Should You Choose First? For a continuous lower outline that retains the main factory panels, we recommend planning the front lip, side skirts and rear diffuser together. For a focused upgrade, prioritize the component that changes the area you care about most. Your Main Goal Prioritize When to Add Another Component Define the lower front Front lip Add side skirts and a diffuser when you want the lower line to continue around the car Complete the lower outline Front lip, side skirts and diffuser This combination can complete the build; add flares only if fuller arches become a separate goal Emphasize the wheel arches Fender flares planned around your wheel setup Add side skirts when you also want a stronger carbon line beneath the doors between the arches Add front-panel depth and carbon contrast Carbon hood Add a front lip when you want a defined lower bumper edge beneath the sculpted hood Reshape the rear-panel appearance Carbon trunk lid Add a diffuser when you also want more depth beneath the rear bumper Suppose you have already fitted a front lip and now want the whole car to feel more consistent. We recommend side skirts and a rear diffuser as the next stage. They continue the lower line through the profile and rear, making them a more direct match for that goal than a hood. A carbon hood can be the first upgrade when the upper front is your main focus. The same applies to a replacement trunk lid when you want the rear panel and its trailing edge to become the defining feature. Either panel can lead the build, with lower-body parts added later if you want to extend the treatment. A front lip alone can also complete a focused front upgrade. Once it gives the nose the definition you wanted, further parts should follow a new styling goal. The Tesla Model 3 body kit collection includes all six component types. Use your main goal and the parts already fitted to select the combination, then plan installation around those components. Frequently Asked Questions How Should My Model 3’s Paint Color Guide My Carbon Upgrades? On lighter paint, carbon creates stronger contrast, making a lip, skirts and diffuser stand out clearly. On darker paint, the effect is subtler, so sculpted contours become more important. We recommend lower-body accents for a crisp outline, or a hood or trunk lid when you want a larger carbon focal point. Do These Model 3 Parts Fit Highland or Later Versions? No. These six RevoZport components are designed for the 2018–2020 first-generation, pre-facelift Model 3 Sedan. This fitment excludes Highland and other model years. Will a Body Kit Lower My Model 3’s Ride Height? A body kit does not change the suspension’s ride height. Lower extensions can make the body look closer to the road, and their installed position may reduce clearance beneath particular areas. The suspension setting and the lowest fitted component are separate considerations, especially on ramps, speed bumps and steep driveway entrances. Conclusion For a Tesla Model 3 body kit that creates a continuous lower outline while retaining the main factory body panels, we recommend a coordinated front lip, side skirts and rear diffuser. Plan these three together when you want the front, profile and rear to share the same carbon treatment. Choose fender flares when fuller wheel arches are your priority, a carbon hood for a more sculpted front surface, or a replacement trunk lid for an integrated carbon rear. These additions let you carry the build toward the areas you most want to emphasize. Explore the RevoZport Tesla Model 3 body kit to put together the combination that suits your 2018–2020 pre-facelift Sedan and the look you want to achieve.
Xiaomi YU7 Body Kit Buying Guide
Xiaomi

November 04, 2026

Xiaomi YU7 Body Kit Buying Guide: Which Parts Are Worth Choosing?

A Xiaomi YU7 body kit can sharpen the car’s flowing lines or give it a broader, more assertive presence. The parts worth choosing depend on the result you want, how they work together and how the finished car fits your daily use. Here’s how to choose a setup that brings those priorities together.  What Do You Want to Change About Your Xiaomi YU7? A body kit can give your Xiaomi YU7 a more defined version of its original shape or create a broader, more assertive silhouette. If you enjoy the flowing bodywork, sharper lower edges and carefully placed carbon details can add depth while keeping those familiar lines in focus. A widebody treatment makes a larger change to the proportions. Fuller front quarters and wider arches give the body more presence around the wheels, especially from a three-quarter view. Both directions can create a striking result: the choice is how much of the YU7’s original character you want to emphasize and how much you want to reshape. Which Xiaomi YU7 Body Kit Parts Are Worth Choosing? The front assembly, side skirts and rear diffuser are worth prioritizing for a more defined lower outline. Widebody fenders and arches create a broader silhouette, while a hood or spoiler brings attention to the upper surfaces. Each contributes something different to the way your YU7 looks as you approach it, walk alongside it or see it from behind. Front Lip and Air Vents The Xiaomi YU7 front lip and air-vent assembly gives the nose a stronger lower edge and more depth around its openings. The lip defines the bottom of the front profile, while the reshaped vent section adds sculpted detail above it. Together, they give the smooth front end a more pronounced structure. RevoZport’s assembly combines a carbon fiber lip with a replacement lower-front air-vent section. We recommend it when you want the nose to become a stronger feature of the car, particularly from the front and three-quarter views. Canards can add further definition at the corners once the main front shape is established. Side Skirts Side skirts connect the lower front and rear, giving the YU7 a longer, more continuous line between the wheels. Their effect becomes especially noticeable when a stronger front lip or diffuser leaves the middle of the car looking comparatively plain. RevoZport’s skirts attach to the original lower sill area. The carbon edge gives the body a visually lower, more grounded appearance while allowing the painted doors and flowing upper surfaces to remain prominent. They are particularly worthwhile alongside front and rear upgrades, where that connecting line helps the entire combination look considered from the side. Rear Diffuser and Spoilers The rear diffuser gives the lower bumper a stronger base. RevoZport’s replacement assembly uses greater depth, open grille areas and vertical channels to introduce more structure beneath the tailgate. It also retains the required factory sensors and reflectors. Choose it first when you want the lower rear to carry the same visual presence as an upgraded front end. The mid and roof spoilers shape different parts of the rear profile. A mid spoiler follows the tailgate edge above the rear lights, creating a sharper horizontal line across the body. A roof spoiler emphasizes the upper outline where the roof meets the rear of the car. Combining these elements gives the rear a layered appearance, with distinct details at the roof, tailgate and bumper. Widebody Fenders and Wheel Arches Widebody fenders and wheel arches are worth choosing when you want a more substantial silhouette. RevoZport’s replacement front fenders extend the body outward, giving the front quarters greater presence. The wider arch components carry that shape around the wheels and toward the rear quarters. The visual change is especially clear from a three-quarter angle, where you can see both the broader shoulders and the relationship between the arch edges and wheel faces. A wheel positioned farther inside the arch creates a different stance from one sitting closer to the outer body line. For this reason, we recommend planning the fenders, arches and wheel position together. These components establish the proportions of a widebody build, so they deserve attention before smaller finishing accents. Carbon Hood A carbon hood creates a broad visual focal point across the front of the YU7. Its clamshell shape provides a large surface for exposed weave, bringing carbon into the center of the design and changing the balance between painted bodywork and composite details. RevoZport’s replacement hood adds a stronger center section and sculpted vent forms while retaining the factory hinge, latch and frunk architecture. It gives the upper front more definition while preserving familiar access to the front storage area. Choose the hood when you want carbon to play a prominent role in the finished car. It can bring the upper body into a build with pronounced front and side detailing. For a subtler appearance, smaller accents let the paint remain the main visual feature. Which YU7 Body Kit Setup Best Matches Your Goal? Choose a focused upgrade to improve one area, a lower-body combination for a connected outline, or a complete widebody build for broader proportions. A Focused Upgrade Selected parts suit a YU7 whose overall appearance you already enjoy. A diffuser may be enough to give the lower rear the definition you want. This approach also lets you retain existing upgrades, matching each addition to their shape and finish. A Coordinated Lower-Body Setup We recommend the front lip and air-vent assembly, side skirts and rear diffuser when you want a noticeable change while keeping the painted upper body prominent. Plan their depth and projection together, with compatible junctions around the existing bodywork. A mid or roof spoiler can follow if you want more emphasis higher up. A Complete Widebody Build Choose the RevoZport Xiaomi YU7 complete body kit when a broader silhouette is central to your plans. Its replacement panels and add-on details create a coordinated treatment across the front, sides and rear. Develop the fenders, arches and wheel position together to establish the stance. If you assemble a custom combination from individual parts, plan the finished shape before deciding the fitting sequence. Use these priorities to compare the three approaches: Your Goal Recommended Setup Main Planning Priority Improve one area Selected components Fit and finish alongside existing parts Define the lower body Front assembly, side skirts and diffuser Balanced projection and compatible junctions Create a wider silhouette Complete widebody plan Fenders, arches and wheel position Compare the total project cost, including installation and any wheel or finishing work. Why Choose a Carbon Fiber Body Kit for Your Xiaomi YU7? Carbon fiber offers lightweight composite construction, distinctive surface texture and a way to carry a consistent material theme around the YU7. Its appeal comes from how the parts are made and how they look on the car, from the weave you notice up close to the contrast that defines the body from farther away. Carbon Construction and Manufacturing Quality RevoZport’s YU7 components use pre-preg dry carbon cured in an autoclave. The reinforcement contains resin before molding, and controlled heat and pressure cure the shaped laminate. Toray Composite Materials America explains that autoclave pressure helps consolidate the layers and limit void formation. This gives the manufacturing process a meaningful role in the quality of the finished composite. Toray’s autoclave curing guide explains how the process works. Carbon composites can provide high strength relative to their weight, with the finished properties shaped by the laminate design. If reducing weight is part of your project, compare the complete replacement component with the factory assembly it replaces, including the necessary hardware. Exposed Carbon and Visual Contrast Exposed carbon adds a surface texture that changes with light and viewing angle. As you walk around the YU7, the weave becomes more or less prominent, giving the exterior a different character from a uniformly painted finish. Up close, you notice the pattern; from farther away, the contrast with the paint helps define the edges and shapes of the components. That contrast can be subtle or prominent. A narrow carbon lip or skirt adds detail around the lower body while keeping the paint dominant. Across the broad hood, the same material becomes a central feature, drawing the eye over the front of the car. Choose smaller areas of exposed carbon for an understated finish, or broader panels when you want the material itself to shape the car’s identity. The appeal lies in finding a balance you enjoy both from across a parking space and when standing beside the car. Consistent Finish Across the Complete Setup A consistent finish helps separate components feel like parts of one design. Similar weave appearance, gloss and edge finishing carry the same visual character from the front lip along the skirts and around to the rear. This becomes particularly valuable where components meet or sit close together. A skirt and arch with complementary finishes let their shapes flow together, while a consistent gloss gives larger and smaller carbon surfaces a shared appearance. RevoZport’s YU7 components also include a UV-resistant clear coat to help protect the exposed finish. For a build completed in stages, choosing a consistent weave and finish from the beginning helps later additions look at home. The result is an exterior whose materials feel as coordinated as its proportions. What Fitment, Wheel Clearance and Installation Does a YU7 Body Kit Require? A YU7 body kit needs parts matched to the vehicle’s bodywork, sufficient wheel clearance and an installation plan that accounts for both replacement panels and add-on components. RevoZport specifies professional installation for the complete program. Vehicle Version and Existing Bodywork The RevoZport YU7 Street Program fits Standard, Pro, Max and GT models in the 2025-onward YU7 range. Choose components to suit your model year, version and existing bodywork. Existing modifications matter most at the joining points. A changed bumper section or arch can alter how the next component meets it. The installer should assess those interfaces together with any nearby sensors, reflectors and moving panels affected by the work. Wheels and Widebody Clearance Wheel width, offset, tire dimensions and ride height determine how the wheels sit within the wider body. Plan their position around the fitted fenders and arches, with room for full steering movement and suspension travel. Your existing wheels may remain suitable if they provide the clearance and appearance you want. Where a different position is needed, use the installed body dimensions and available inner clearance to guide the wheel specification. On a car with adjustable ride height, assess the combination at the heights you use on the road. Fitting and Everyday Use Installation begins with a trial fit of the selected components so the installer can align adjoining edges and assess panel gaps. Replacement sections are removed and exchanged, while add-on pieces use their specified fixings or bonding method. Final checks cover secure attachment, panel operation and the functions affected by the work. For the YU7, that means allowing for replacement work at the front air-vent assembly and rear diffuser, with additional panel work for a hood or widebody conversion. Side skirts attach at the original lower sill area. The fitting estimate should reflect those different tasks, together with any planned finishing work. Think about the places you drive every day, too. The front lip needs enough clearance for your garage entrance, and the side skirts should suit the way you step into the car. Assessing those details during fitting helps the finished setup work as well on your usual route as it does parked. Conclusion For a more defined YU7 that still keeps its painted bodywork in focus, start with the front lip and air-vent assembly, side skirts and rear diffuser. We recommend this direction because it brings the front, side and rear together while leaving room to add a hood or spoiler later. If a wider stance is what draws you to the project, plan the complete widebody treatment from the outset, with the fenders, arches and wheel position developed together. With that direction in mind, explore the RevoZport Xiaomi YU7 body kit range and select the parts that create the look you want to see in your driveway. Take that selection to your installer to work through fitment and daily clearance, so you can move ahead with a clear picture of both the finished car and the work involved. Frequently Asked Questions Can You Mix Xiaomi YU7 Body Kit Parts from Different Brands? Yes, when their mounting points, shapes and clearances are compatible. Pay particular attention to adjoining pieces, such as a side skirt and wheel arch, because their edges need to meet properly. Trial fitting establishes that relationship, while a similar weave and gloss help the finished combination look consistent. Can You Paint or Wrap Carbon Fiber YU7 Parts? Yes, provided the surface and coating are suitable for the chosen process. A professional finisher can assess the preparation and adhesion requirements. Partial paint or wrap coverage is an option if you want the main panel to match the body color while leaving selected carbon details visible. Can You Return a Modified YU7 to Its Factory Appearance? Often, but the work involved depends on how the components were fitted and whether the original mounting areas were altered. Keeping the factory panels, trim and hardware gives you more options later. If returning to the original appearance matters to you, include removal and restoration in the installation discussion.
BMW X6 G06 Body Kit Guide
BMW

November 04, 2026

BMW X6 G06 Body Kit Guide: Choosing Parts for M Sport Models

A BMW X6 G06 body kit should suit both your factory M Sport bodywork and the change you want to see. For a continuous carbon outline around the lower body, we recommend planning the front lip, side skirts and rear diffuser together. A more focused change can begin with a lip or rear spoiler, depending on which view of the car you want to emphasize.  The X6’s sloping roof and substantial body give it a strong silhouette before any parts are added. A well-chosen BMW X6 body kit can give the lower edges more definition, sharpen the bumper details or draw attention to the tailgate while preserving that coupe-SUV character. Which BMW X6 G06 Body Kit Parts Fit Pre-LCI and LCI M Sport Models? RevoZport’s front lip, front bumper vent frames and front canards require matching Pre-LCI or LCI versions. The hood, side skirts, rear spoiler, rear diffuser and side fender vents fit both versions. These applications are exclusively for G06 vehicles with factory M Sport bodywork. Component Fitment Across Pre-LCI and LCI Front lip Separate versions; match the factory M Sport front bumper Front bumper vent frames Separate versions; match the factory M Sport front bumper Front canards Separate versions; match the factory M Sport front bumper Hood Shared across both versions Side skirts Shared across both versions Rear spoiler Shared across both versions Rear diffuser Shared across both versions Side fender vents Shared across both versions Three Front Components That Must Match the Bumper The front lip follows the bumper’s lower edge. Vent frames surround its lower openings, while the canards trace the outer corners. Each part depends on the shape of the bumper where it sits, so the three pieces need to match the same front-end version. Choose the BMW X6 G06 Pre-LCI body kit range for 2020–2023 models or the BMW X6 G06 LCI body kit range for 2024 onward. LCI identifies the facelift, which uses different front components. For cars near the changeover, use the production specification and factory bumper design alongside the model year to identify the correct version. Five Components Shared Across Both Versions The hood, side skirts, rear spoiler, rear diffuser and side fender vents share fitment across Pre-LCI and LCI factory M Sport models. This gives both versions the same choices for extending the carbon treatment across the upper front, profile and rear. Once the three bumper-specific parts are matched, the remaining selection can follow your styling goal: a continuous lower outline, a more pronounced tailgate edge or a larger carbon feature across the hood. Which Carbon Parts Should You Choose for the G06 Front End? For a restrained front upgrade, we recommend starting with a front lip. Add the matching vent frames and canards when you want the carbon treatment to extend across the bumper. A carbon hood becomes a stronger priority when your goal includes a more substantial change to the upper front. Front Lip: Defining the Lower Edge The G06 front lip adds a continuous carbon line beneath the M Sport bumper, giving the lower front a clearer outline. It suits owners who like the factory front design and want a more pronounced base beneath the bumper openings. The BMW X6 G06 LCI carbon fiber front lip has a broad center section that emphasizes the horizontal lower edge. Its raised outer sections meet the bumper corners and connect visually with the matching LCI canards. Seen from a front corner, this arrangement carries the carbon detail across the nose and upward at each side. The Pre-LCI lip follows its own bumper geometry. A lip can remain the main front modification in a restrained build. Keeping the upper bodywork visually familiar concentrates the change along the lower edge, so a lip alone is our recommendation when that is the area you want to emphasize. For everyday use, its installed projection and clearance also deserve attention, particularly on sloped driveways. Vent Frames and Canards: Completing the Front Details The vent frames outline the central lower bumper openings above the lip. Their angular edges give those openings a more deliberate shape and add carbon detail within the bumper face. The canards follow the tall outer bumper openings and continue downward toward the lip. Their shape connects the bumper’s vertical details with its horizontal lower edge, which becomes especially noticeable from a front three-quarter view. Together, these pieces spread the carbon treatment across the lower bumper. The lip establishes the base, the vent frames define the inner openings, and the canards finish the outer corners. The result is a more extensive change to the bumper than a lip alone. Our recommendation is to keep the lip as the starting point, then add the vent frames and canards when the entire bumper is your focus. For that goal, plan the three pieces together so the central openings, outer corners and lower edge share a coordinated treatment. All three must match your Pre-LCI or LCI version. Carbon Hood: Extending the Design Across the Upper Front A carbon hood changes a much larger surface than the bumper details. RevoZport’s G06 hood uses a defined central structure and vent openings to carry the front design toward the windscreen. From a front three-quarter view, the upper panel becomes a major feature above the lower bumper. Its larger carbon surface and sculpted details bring the transformation higher across the front of the vehicle. For a build centered on the lower body, we recommend retaining the factory hood and concentrating on the lip and bumper details. A replacement carbon hood becomes worthwhile when you want a more extensive carbon presence across the front. If the hood itself is the main feature you want to change, it can take priority early in the build. Professional fitting should address panel alignment, latch operation and the adjoining body gaps. Allow for that work when planning the hood alongside the rest of the front. Which Parts Best Define the G06’s Side Profile and Rear? Side skirts give the X6 a more continuous lower outline, while a rear spoiler sharpens the tailgate edge and a diffuser adds depth beneath the bumper. These changes complement the sloping roof by bringing definition to the body below it. Side Skirts and Fender Details RevoZport’s side skirts run between the wheels and rise toward the rear. Their layered profile adds depth beneath the doors, carrying the front lip’s lower line toward the diffuser. From the side, that connection gives the substantial body a more grounded appearance. We recommend including the skirts when you are planning both a pronounced front lip and rear diffuser. They bring the middle of the car into the same visual treatment. Side fender vents add a smaller, upright carbon accent near the front wheel, making them a finishing detail when you want the carbon theme to extend above the sill line. Rear Spoiler or Diffuser? The rear spoiler follows the width of the tailgate with a low, extended shape. It gives the trailing edge a more pronounced finish while keeping the X6’s sweeping roofline prominent. Choose it first for a restrained upgrade concentrated around the upper rear. The diffuser creates a stronger base beneath the bumper. Its deep center section, framed outer areas and pronounced vertical elements give the lower rear more depth and structure. It is the better starting point when you want the rear bumper to carry similar visual emphasis to an upgraded front lip. Pair the spoiler and diffuser when you want both a sharper tailgate edge and a more sculpted lower rear. Which RevoZport G06 Parts Should You Prioritize for Your Build? For an all-round exterior upgrade, prioritize the correct front lip, side skirts and rear diffuser. They establish a connected lower outline across the front, profile and rear. Smaller accents and the hood can then follow your preferred level of detail. A focused project can start with fewer parts. The useful question is which view of your X6 you most want to change. Your Main Goal Start With Add When the Goal Expands A more defined lower front Version-matched front lip Matching vent frames and canards A coordinated lower-body outline Front lip, side skirts and rear diffuser Rear spoiler and smaller carbon accents A restrained tailgate upgrade Low rear spoiler Rear diffuser for more lower-bumper detail More extensive front detailing Lip, vent frames, canards and grille Hood for a larger upper-panel change A complete carbon exterior A version-matched body kit plan Review the selected package’s individual components A hood follows a different priority. Choose it because you want the upper front to become a major carbon feature. It does not need to be the next step after completing the bumper. A complete package suits an extensive exterior project; a selected group of parts suits a more focused change. In either case, professional installation should follow the fitting requirements of the individual components. Plan the final appearance first, then schedule the work around the parts that support it. FAQs About BMW X6 G06 Body Kits Will This RevoZport Body Kit Fit a Non-M Sport G06? No. This RevoZport G06 range is designed exclusively for vehicles with factory M Sport bodywork. The shared Pre-LCI and LCI fitment of certain components applies within that M Sport application. Can I Fit an LCI Front Lip to a Pre-LCI M Sport X6? No. The LCI lip is shaped for the facelift M Sport bumper. A Pre-LCI X6 retaining its original M Sport bumper requires the corresponding Pre-LCI lip. The front bumper vent frames and canards also need to match that version. How Does a Front Lip Affect Everyday Ground Clearance? A front lip adds an edge below and ahead of the bumper, so both its fitted height and forward projection affect clearance on sloped driveways and ramps. The available margin depends on the installed lip, the car’s ride height and suspension movement. Assessing the fitted setup against your usual access routes is especially useful if the X6 has also been lowered. Conclusion For a BMW X6 G06 with factory M Sport bodywork, we recommend starting with a coordinated front lip, side skirts and rear diffuser. Together, they give the nose a stronger base, connect the side profile and add depth to the rear. Add bumper details for a more complete front, a spoiler for a defined tailgate edge, or a hood for greater carbon presence above the grille. Explore the BMW X6 G06 Pre-LCI body kit or the BMW X6 G06 LCI body kit for your version. Use the complete setup as inspiration, then choose the parts that give your X6 the presence you want. You can begin with one area or plan the whole exterior together.
BMW X3M Body Kit Guide
BMW

November 03, 2026

BMW X3M Body Kit Guide: F97 Fitment, Parts and Choosing Your Setup

The right BMW X3M body kit matches your F97’s facelift version, changes the areas you care about, and suits your daily driving. Start with the car’s existing bodywork, then decide how much of its appearance you want to change. Perhaps you like the factory shape but want a more defined lower edge. Or you want carbon details across the front, sides and rear. Those goals call for different combinations. You can build around a few carefully chosen details or plan a coordinated exterior from the outset. The following guide explains which parts fit your F97 and how each contributes to the finished look. Which BMW X3M Body Kit Fits Your F97? RevoZport’s BMW X3M F97 body kit range centers on the LCI model. The hood, side fender vents, side skirts and roof spoiler also fit pre-LCI cars, giving owners of either version several ways to develop the exterior. Choose the remaining components by the facelift version and bodywork fitted to your car. Pre-LCI and LCI Fitment by Component LCI is BMW’s term for its mid-cycle update. Changes to the front-end shape make the facelift version particularly important when selecting bumper-mounted parts. The RevoZport components below have different F97 applications: RevoZport Components F97 Application Front lip, inner bumper vents, outer intake covers, kidney grille and three-piece rear diffuser LCI (2022+) Hood, side fender vents, side skirts and roof spoiler Pre-LCI (2019–2021) and LCI (2022+) For example, the BMW X3M carbon fiber hood fits both versions, giving a pre-LCI owner a replacement-panel option within the range. The front lip follows the LCI bumper’s lower edge and belongs with that bodywork. These application years help narrow the selection. Your production details and the panels actually fitted to the car complete the picture, especially if its registration date falls near a model update. Existing Bodywork and Trim Details Previous modifications can change how a new component fits. A replacement bumper affects the mounting surface for a lip, while different exhaust tips affect the space around a diffuser. Installation records and part numbers are useful when building on an existing setup. They let your installer identify the surfaces, brackets and trim that the next component will meet. The same approach applies to Competition models: match each part to the facelift version and current bodywork. What Does a BMW X3M Body Kit Include? RevoZport’s BMW X3M F97 LCI Street Program covers the front lip, inner bumper vents, outer intake covers, kidney grille, hood, side fender vents, side skirts, roof spoiler and three-piece rear diffuser. Together, these components sharpen the nose, connect the lower side profile and give the rear more depth. You can focus on one area or develop a coordinated look across the car. Front Lips, Grilles and Bumper Details A front lip defines the bumper’s lower edge, making it a useful starting point when you want a stronger nose while keeping the factory bumper. RevoZport’s F97 LCI lip is an add-on component shaped around that lower surface. The surrounding pieces have different roles. RevoZport’s inner bumper vents attach as additions, while the outer intake covers replace the original trim. This distinction affects the fitting work even though both change details around the bumper openings. The replacement kidney grille carries the carbon finish higher up the nose and retains provision for the factory front camera where equipped. It suits a build that extends beyond the lower lip into the central grille area. Side Skirts and Fender Details Side skirts extend the lower sill line between the wheels. On the X3M, this helps connect the front and rear additions across the long side profile. RevoZport’s BMW X3M side skirts are left and right add-on pieces that follow the existing lower body. Side fender vents address a smaller area between the front wheel arch and door. The RevoZport pieces replace the vent trim, giving that section a carbon detail while retaining the surrounding fender panel. They suit an owner who wants a smaller visual change alongside, or ahead of, the side skirts. Rear Diffusers and Roof Spoilers A diffuser changes the lower rear bumper around the exhaust outlets. RevoZport’s F97 LCI design uses a three-piece replacement arrangement with a defined center section and fins. Its shape gives the lower rear more depth and works with the original exhaust or a compatible aftermarket setup. A roof spoiler changes the upper outline above the rear glass. The RevoZport add-on follows the factory roof and upper-tailgate line, extending that edge while retaining the X3M’s SUV proportions. The two parts address different areas of the rear view. A diffuser emphasizes the bumper and exhaust area; a roof spoiler gives the roofline a more pronounced finish. A Replacement Carbon Fiber Hood A hood changes one of the largest visible panels on the car. RevoZport’s replacement combines exposed carbon with functional vent and heat-extraction channels, making it relevant when your plans include both the upper-front appearance and airflow through the hood. This is a larger installation than adding exterior trim. The work includes removing the original hood, transferring its accessories and fitting the replacement panel. It deserves its own place in the installation plan, with attention to panel alignment and secure closure. How Do You Choose the Right Look for Your X3M? Start with how much of the factory shape you want to retain, then choose the projection and visible carbon coverage to suit. A full side view and front and rear three-quarter views help you judge how the changes sit together. Subtle Details or a More Pronounced Outline A restrained build keeps the painted body surfaces visually dominant. A slim lower edge and a few carbon accents can sharpen the X3M while leaving much of its factory character intact. This direction suits an owner who already likes the car’s shape and wants to refine particular areas. A more pronounced build gives the additions greater visual weight through deeper edges, stronger rear fins or broader carbon coverage. The useful comparison is how those shapes sit together at normal viewing distance. A projecting front lip can look appealing close up yet dominate a car with otherwise understated sides and rear. Look at the whole car from the side when choosing your combination. A similar level of definition in the front lip, side skirts and rear diffuser helps the lower outline flow naturally from front to rear. Consistent Finishes Across the Body Carbon weave, gloss level and body color all affect the result. Differences are especially noticeable where two pieces meet, so adjacent grille and bumper details deserve a close comparison. Existing gloss-black trim can also provide a reference for the finish you prefer. Exposed carbon draws attention to the material’s pattern; a gloss-black finish emphasizes the shape and reflections. Decide how much contrast you want against the paint, then carry that choice through the parts you add. Matching finishes across a few carefully chosen components can give the car the visual continuity you want. Complete BMW X3M Body Kit or Individual Parts? Choose a complete package when you want to reshape the front, sides and rear together. Individual parts are a better fit for one specific change or a build you want to develop in stages. A Complete Package for a Planned Build A package lets you select the components and finishes together, then coordinate installation around the finished car. RevoZport’s BMW X3M F97 LCI body kit range brings front, side and rear upgrades into its Street Program, making it easier to plan a consistent exterior. Compare the included parts with your intended result. A package earns its place when those components contribute to the look you want. Individual Parts for a Focused or Staged Upgrade A roof spoiler may be enough to finish the rear outline, while side skirts can connect front and rear upgrades already on the car. Selecting individual parts lets you keep the details you enjoy and focus on the area you want to change. You can fit those pieces together or add them over time. If you prefer a staged upgrade, settle on the carbon finish and overall style early so each addition complements the last. Living with the first change also gives you time to decide whether you want to take the exterior further. What Should You Consider for Installation and Daily Use? Plan professional fitting, everyday clearance and ongoing care alongside the parts you choose. The finished setup should suit your usual roads and parking spaces as well as the appearance you want. Installation Process and Fitting Costs An add-on lip, replacement grille and replacement hood involve different work. RevoZport recommends professional installation, with the instructions for each component guiding the process: Prepare: Match the parts and hardware to the relevant guide, protect nearby surfaces and prepare the mounting areas. Trial-Fit: Position each component and align its edges with the surrounding bodywork. Attach: Follow the specified fixing or bonding method, transferring original fittings where required. Inspect: Check attachments, panel gaps and any affected latch, camera or sensor functions. Use the RevoZport installation guides to locate the BMW X3M instructions matching your component’s part number.  Clearance and Everyday Access The new part’s lowest and outermost edges determine how it meets everyday obstacles. A front lip reaches a garage ramp before the front wheels do, making its projection relevant alongside ride height. Think about a steep driveway, a parking stop or an uneven entrance you use regularly. Existing suspension changes affect the remaining clearance, so judge the proposed setup on your own car. Side skirts also sit where you and your passengers step across the sill. Their outward extension deserves attention if you regularly park in narrow spaces or help children into the rear seats. Factory Functions and Ongoing Care Function checks should follow the area modified. After a grille installation, check the front camera where equipped. A replacement hood needs correct alignment and secure latch engagement, while rear additions need clearance around the tailgate and exhaust. For ongoing care, use cleaning products suited to the surface finish and rinse away grit before wiping. Exposed edges and attachment points also deserve inspection after contact with a ramp or road debris. Addressing a loose fitting or damaged edge early helps keep the installation in good condition. Conclusion For a daily-driven BMW X3M, we recommend starting with the area you most want to change. If you already like most of the car’s appearance, a well-chosen lip, spoiler or pair of side skirts can be enough. A complete package makes more sense when you want to redesign the front, sides and rear together, with the finish and fitting work planned as one project. If that fuller look is what you have in mind for your F97 LCI, explore the RevoZport BMW X3M body kit to see how the components come together. For an LCI, use the complete setup to guide your combination; for a pre-LCI, start with the compatible hood, side fender vents, side skirts or roof spoiler and choose the area you most want to emphasize. Frequently Asked Questions Does a BMW X3M Body Kit Make the Car Wider? It can create a wider-looking stance. Any actual increase in width depends on how far the fitted components project beyond the original bodywork. Can You Keep the Factory Exhaust with an X3M Body Kit? Yes, if the diffuser accommodates the factory exhaust outlets. With aftermarket tips, check their diameter, spacing and projection against the diffuser openings. Do Carbon Fiber Body Kit Parts Need Painting? Exposed-carbon parts supplied with a finished protective coating can be installed without painting. Paint or partial color matching is an optional styling choice for suitable parts. Can You Remove a Body Kit and Return the Car to Stock? Often, provided you retain the original parts. Bonded additions or modified mounting points may need restoration work, so reversibility depends on the installation method.
BMW M2 F87 Body Kit Guide
BMW

November 03, 2026

BMW M2 F87 Body Kit Guide: N55 vs Competition and What to Choose

The right M2 F87 body kit starts with your front bumper: the original N55 M2 and M2 Competition use different front components. Once you have the correct version, the choice becomes more personal.  You may love the factory shape and want a sharper lower edge, or already have a spoiler you want to keep. RevoZport’s F87 Street Program offers individual components and complete kits for both versions, giving you room to build around those preferences. A focused front upgrade suits a smaller change; a coordinated front, side and rear package suits a complete exterior project. Which BMW M2 F87 Body Kit Fits Your Version : Original M2 or Competition? Choose the front lip and bumper inserts for the factory bumper fitted to your F87. The original N55 M2 and M2 Competition have different front-end shapes, so each uses dedicated RevoZport front components. The side skirts, rear diffuser and trunk spoiler share physical components across the two applications. Original M2 With the N55 Front Bumper The original M2 has a softer lower-front shape. Its bumper combines a central lower opening with rounded outer areas, giving the nose a different starting point from the Competition. TheBMW M2 F87 N55 Body kit uses a dedicated lip and bumper inserts shaped around that original front end. The lip follows the lower opening and gives the rounded corners a sharper base. Matching inserts frame the outer openings, bringing carbon detail into the bumper face. For an N55 owner, this creates a more defined front while preserving the shape that gives the original M2 its character. The painted bumper and intake layout remain familiar, with the carbon pieces emphasizing their edges. M2 Competition With the Factory Front Bumper The Competition starts with a more angular front and larger openings. BMW Group’s 2018 announcement,The New BMW M2 Competition, describes the revised front design and kidney grille. The BMW M2 Competition F87 Body Kit uses a dedicated lip that follows the Competition bumper’s lower geometry, with matching inserts framing the outer openings. Together, they give the more aggressive factory front a connected carbon outline, linking the bumper face to the edge beneath it. The fitted bumper determines which front components suit your car. If a previous owner installed an aftermarket bumper, its lower profile and mounting points become part of the fitment assessment. Shared Side and Rear Components The RevoZport side skirts, one-piece rear diffuser and trunk spoiler share physical components between the N55 and Competition applications. They follow the factory side sills, lower rear bumper and trunk lid, giving both versions the same side and rear design with their own front treatment. That shared design also gives you flexibility. You can retain the character of your N55 or Competition front while choosing how much carbon detail to carry along the sides and across the rear. What Does the RevoZport M2 F87 Body Kit Change? The RevoZport M2 F87 Street Program includes five component groups: a front lip, bumper inserts, side skirts, a rear diffuser and a trunk spoiler. These are available as individual upgrades or a complete package, with dedicated front components for the N55 M2 and M2 Competition. Together, they give the F87 a sharper lower outline and a more defined rear. Each component changes a different area, so you can picture what a single addition will do as well as how the complete kit looks. Front Lip and Bumper Inserts The front lip creates a stronger horizontal edge beneath the painted bumper. On the original N55 M2, it adds definition below the rounded lower corners. On the Competition, it follows the more angular front and gives the larger openings a distinct base. Bumper inserts extend that change upward around the outer openings. With the lip alone, carbon is concentrated along the bottom edge. Adding the inserts carries it into the bumper face, giving the nose more visual depth when viewed from the front quarter. Side Skirts The add-on side skirts follow the factory sills beneath the doors, making the lower body appear closer to the ground. They carry the line established by the front lip toward the rear wheels, giving the side view a more continuous carbon outline. Their rearward shape also aligns visually with the diffuser’s outer fins. As you move around the car, the skirts help connect the front treatment to the lower rear. One-Piece Rear Diffuser TheBMW M2 Competition F87 Carbon Rear Diffuser replaces the lower rear section with one component integrating the central channels, quad-exhaust openings and outer bumper corners. The same physical diffuser component serves the corresponding N55 application. Its shape adds definition around the exhaust and extends the change across the lower bumper. The outer fins give the rear a broader-looking base and continue the direction of the side skirts, which is particularly visible from a rear three-quarter angle. Trunk Spoiler The add-on trunk spoiler gives the factory trunk lid a more pronounced trailing edge. Its full-width shape and raised center draw attention across the upper rear, above the area changed by the diffuser. On its own, it adds definition to the trunk silhouette. Combined with the diffuser, it gives the rear two distinct visual features: a stronger upper edge and a more sculpted lower bumper. The complete package connects those changes through the side skirts to the front of the car. Should You Choose an F87 Front Lip Alone or Add Bumper Inserts? Choose the front lip alone when you want a sharper lower edge while keeping the factory bumper face prominent. Add matching inserts when you want carbon to frame the outer openings as well. Front Lip for a Focused Change A lip is a good starting point if you already like the painted bumper and intake shapes. It adds a defined base beneath them, concentrating the change along the lowest part of the nose. On a daily-driven F87, the installed position deserves as much attention as the appearance. A lowered car approaching a sloped driveway has a different clearance requirement from one at factory ride height. Your installer can assess the lip’s projection and outer corners alongside the suspension setup and entrances you regularly use. Matching Inserts for More Carbon Detail The inserts extend the carbon treatment upward around the outer bumper openings. Paired with the matching lip, they give the front a stronger contrast between the painted bodywork and carbon surfaces. A front three-quarter view is useful here because it shows both the bumper face and the lip’s outer ends. If the lower edge provides the change you want, the lip alone is a complete choice. The inserts suit an owner who wants those surrounding openings to become a more noticeable part of the design. For a car with an existing aftermarket lip, the two components’ shapes and finishes also need to work together. RevoZport’s matching lip and inserts provide a coordinated starting point for that front treatment. How Should You Combine F87 Side Skirts, a Rear Diffuser and a Spoiler? Pair the side skirts and diffuser when you want the lower-body treatment to continue from the doors around the rear bumper. Choose the trunk spoiler according to how much you want to change the upper rear silhouette. Side Skirts and Diffuser Together The diffuser’s outer fins follow the rearward shape of the matching side skirts, carrying the carbon outline from beneath the doors around the lower bumper. Viewed from the rear quarter, the two parts give the side and rear a more connected appearance. This pair suits a car whose front already looks the way you want. If your attention is mainly on the exhaust area, the diffuser alone provides a focused rear upgrade. A Spoiler to Suit the Existing Rear The trunk spoiler changes the edge above the bumper. Its raised center adds definition to the factory trunk lid, making it a useful standalone option when the upper rear looks too understated to you. A car with a spoiler you already enjoy may only need the diffuser, or the diffuser and skirts, to reach the look you want. Comparing the existing spoiler’s profile and carbon finish with the proposed additions helps you judge the complete rear view. Adding all three suits a build where both the upper and lower rear are part of the planned change. The skirts and spoiler are add-on components; the diffuser replaces the existing lower rear section. Professional fitting should follow each component’s instructions, with the exhaust-tip position included in the diffuser fitment assessment. Should You Choose a Complete F87 Body Kit or Build in Stages? Choose a complete kit when the finished exterior is already clear in your mind. A staged build suits you when you want time to assess each change or plan around components already on the car. Complete Kit for a Settled Design A complete kit lets you plan the front, sides and rear together, including the carbon finish and installation work. This approach is useful when you already want the whole package. Your installer can review the components alongside the car’s current bodywork and organize the fitting around the complete project. It also gives you one opportunity to judge how the selected finish looks across the exterior. Staged Build for an Evolving Plan Building in stages gives you time to live with a change before deciding what comes next. The view you most want to improve can set the starting point, while parts you still enjoy remain part of the plan. Consistency becomes a decision to carry forward. Keeping the chosen weave and surface finish in your build notes helps guide later additions, especially where new carbon sits close to existing trim. Each stage should feel worthwhile on its own, with enough flexibility to stop when the car looks right to you. Conclusion A well-chosen M2 F87 body kit keeps the car’s compact proportions while developing the areas you want to emphasize. Start with the correct N55 or Competition front components, then choose the extent of the exterior change. A lip offers a focused starting point. Matching inserts develop the front further, while skirts and the one-piece diffuser connect the lower body. The trunk spoiler completes the upper rear when that suits your goal. Explore the corresponding RevoZport BMW M2 F87 N55 Street Program or BMW M2 F87 Competition Street Program with that finished picture in mind, and select the components that contribute to it. Frequently Asked Questions Will a Carbon Fiber Body Kit Still Stand Out on a Black F87? Yes. On black paint, exposed carbon creates a subtle contrast through its weave and reflections. The lip, skirts and diffuser also add defined edges, so the visual change comes from both their shape and surface finish. Will the F87 Rear Diffuser Work With Aftermarket Exhaust Tips? Compatibility depends on the tips’ diameter, spacing and position relative to the diffuser openings. RevoZport’s diffuser follows the factory quad-exhaust layout. Trial fitting with your exhaust in place allows the installer to assess clearance and tip projection before completing the installation. Can I Choose a Different Carbon Fiber Finish? Yes. RevoZport offers custom options including gloss, matte and forged-carbon appearances, with availability depending on the component and specification. Gloss and matte describe the surface sheen; forged carbon has a different visual pattern. For an F87 with existing carbon trim, both the pattern and sheen influence how closely the new pieces match.
Front three-quarter studio view of the muted-green VELOIRE ZEEKR 9X with carbon exterior details
Automotive DesignCarbon FiberREVOZPORTVELOIREZEEKR 9X

October 27, 2026

Inside the VELOIRE ZEEKR 9X: Design and Carbon Fiber Details

The VELOIRE ZEEKR 9X is a complete exterior design by the luxury automotive brand created by REVOZPORT. Its twelve-part program combines replacement carbon-fiber panels with smaller add-on elements, preserving the SUV's upright silhouette and distinctive lighting while reshaping the surfaces around them. The result is easiest to understand through three relationships: carbon against paint, the wheel arches against the lower body, and the upper and lower layers of the rear. The muted-green vehicle photographed here shows how those relationships work on a finished car. Its irregular carbon pattern is one material direction within the program; standard woven carbon offers a different appearance. Neither choice changes the vehicle's powertrain. Keeping the 9X's presence while changing its visual balance A large, upright SUV already occupies a great deal of visual space. Adding more competing features can make it harder to read the original shape. For VELOIRE, the starting point was the ZEEKR 9X's scale, cabin silhouette and recognizable light signatures. The new exterior works around those features. “The 9X already has enormous presence. I didn't want to overpower it. I wanted it to feel calmer and more personal, while keeping the character that made us choose it in the first place.” Mehmet Kok, Co-Founder and Design Director of VELOIRE Look first at the division between the green bodywork and the dark carbon. The painted surfaces keep the main body form readable, while the darker lower edges draw attention toward the base of the car. That changes the perceived stance without implying that the suspension has been lowered. From the side, the wheel arches and skirts connect those darker front and rear elements across the length of the vehicle. Branding is concentrated on the bonnet and tailgate trim. In this design, the material boundaries and silhouette carry most of the identity. The small V emblem on the bonnet becomes a detail to discover at closer range rather than the main feature of the front view. The bonnet emblem and irregular carbon pattern reveal the material at close range. What prepreg dry carbon means for this program The carbon-fiber exterior components use prepreg dry-carbon construction rather than wet lay-up. Prepreg means that the reinforcement contains resin before the component is formed and cured. The word “dry” does not mean that the finished part contains no resin: the resin binds the fibers into a composite. This describes the material route, while the visible pattern and final surface finish are separate choices. VELOIRE offers 1 × 1 plain or 2 × 2 twill woven carbon as the standard specification, with gloss or matte finishing. Forged carbon is an optional material upgrade. In plain weave, the interlacing produces a regular grid-like appearance. Twill produces the familiar diagonal rhythm. The forged-carbon appearance on the photographed car has an irregular, fragment-like pattern instead. On the broad bonnet area, that difference is easy to see; on a mirror cap or a narrow trim piece, the same pattern reads at a smaller scale. Finish changes the way light describes the surface. Gloss gives sharper reflections and makes the carbon-to-paint boundary more pronounced. Matte softens those reflections. Choosing between them is therefore also a decision about how strongly the material should stand out against the painted bodywork. A carbon pattern alone does not establish the part's weight, laminate structure or aerodynamic performance. Here, the confirmed manufacturing description is prepreg dry carbon. The weave and finish choices explain appearance; they are not a published comparison of strength or weight savings. The front: three components with different jobs The bonnet sets the material direction The replacement carbon-fiber bonnet changes a major exterior panel rather than adding a small decorative patch. On this car, the exposed carbon carries across the center of the nose, with the green bodywork remaining visible at either side. The boundary between those surfaces gives the front view a clear structure before the eye reaches the grille and lights. The bumper connects the upper and lower surfaces The replacement front bumper gives that material treatment somewhere to continue. In the photographs, body-color sections around the lamps sit beside darker surfaces framing the central and lower areas. This keeps the original lighting signature prominent while changing the surrounding shape. The effect comes from the relationship between carbon and painted areas, rather than covering every visible surface in the same pattern. The front lip finishes the lower edge The carbon-fiber front lip is a separate add-on beneath the bumper. Its visible edge runs around the lower corners, giving the front a defined termination close to the ground. The bumper shapes the face of the car; the lip defines its bottom line. Treating them as separate elements explains the layered appearance more precisely than calling the entire front end a splitter. The bonnet, replacement bumper and add-on front lip form three distinct layers. The side: connecting the wheel arches, skirts and glass A side profile reveals whether the front and rear belong to the same design. The replacement wheel-arch components establish the contours around the wheels. On the photographed car, their body-color finish lets the arch shape register through light and shadow, while the exposed carbon is concentrated elsewhere. Carbon construction does not require every surface to display its fibers. The replacement side skirts connect the front and rear arch areas along the bottom of the doors. This is a substantial visual connection on a long SUV: without it, the front lip and rear treatment could look like isolated additions. The profile photograph shows both the painted lower-side form and the darker edge underneath it. The side view shows how the arches and skirts connect the front and rear treatments. Higher up, the add-on door-mirror caps repeat the carbon material at a smaller scale. They are a different kind of intervention from the replacement arches or skirts: the caps add a visible surface detail to the mirror housings rather than replacing a large body panel. The rear-quarter-window surrounds carry that material toward the back of the cabin. Their position matters because they sit at the transition between glass and bodywork. In the side view, the dark trim frames the rear-quarter glazing and leads the eye toward the roof spoiler, while the cabin's overall silhouette remains recognizable. The rear: distinct layers around the original light signature The rear treatment has an upper edge, a middle horizontal layer and a lower finish. These should be read separately. The add-on roof spoiler completes the top of the silhouette. The add-on tailgate spoiler, also listed as the mid spoiler, sits below the rear window and introduces another horizontal line across the tailgate area. Between those levels, the replacement full-width tailgate light-panel trim changes the corresponding exterior trim. It retains the original lamps and lighting system. The night photographs make that distinction particularly useful: the illuminated signature remains a recognizable feature, with the trim forming part of the surrounding composition. The tailgate trim changes the surrounding surface while retaining the original lighting system. At the bottom, the replacement carbon-fiber rear lip completes the lower rear treatment. Rear lip is the component's official name. Its role in this article is the shape and material of the lower edge; a diffuser function or measured downforce benefit is not claimed. The stainless-steel exhaust finishers are a separate item in the twelve-part exterior specification. They are visual trim and do not change the original exhaust system, power or performance. Keeping those finishers distinct from the carbon rear lip also avoids describing the whole lower assembly as one carbon component. At night, the original rear light signature remains a defining feature of the car. How the twelve-part specification fits together The complete exterior includes the bonnet, front bumper, side skirts, rear lip, full-width tailgate light-panel trim and wheel arches as replacement elements. The front lip, rear-quarter-window surrounds, roof spoiler, tailgate spoiler, mirror caps and stainless-steel exhaust finishers complete the specification as add-ons. That mix explains why the transformation reaches beyond surface decoration. Replacing a bonnet or bumper changes the corresponding exterior panel. Adding a mirror cap, window surround or spoiler introduces a more localized detail. Each has a different relationship to the original car, even when both use the same visible carbon pattern. The ZEEKR 9X exterior collection brings the component pages together. For understanding the design, the useful comparison is how each part connects to its neighbors: bonnet to bumper, arches to skirts, and rear-quarter trim to the upper and middle rear layers. Wheels and cabin are separate parts of the specification The wheels strongly affect how the photographed car reads, but they are optional rather than part of the standard exterior kit. VELOIRE forged wheels are offered in 23- or 24-inch sizes with configurable finishes. The broad dark centers and lighter perimeter details visible here echo the contrast between the bodywork and carbon surfaces. The image illustrates that visual relationship; it does not identify a universal wheel specification for every 9X. The optional VELOIRE wheel design sits alongside the body-color arch and smaller carbon details. A complete VELOIRE cabin is also available as a separate commission. Leather, carbon and metal details can be developed around the exterior palette. The photographs in this article document the exterior, so they should not be taken as an illustration of a completed cabin commission. Questions about the ZEEKR 9X and VELOIRE Who makes the ZEEKR 9X, and what does VELOIRE do? ZEEKR makes the donor vehicle. VELOIRE is the design-led luxury automotive brand created by REVOZPORT, with Mehmet Kok as Co-Founder and Design Director. This exterior program is engineered by REVOZPORT. VELOIRE and REVOZPORT operate independently of ZEEKR; the project does not imply OEM cooperation, authorization or endorsement. Is the ZEEKR 9X a fully electric SUV? The 9X is a plug-in hybrid SUV. ZEEKR's official European model information identifies its powertrain as a PHEV. Output, battery and other ZEEKR 9X specs must be read against the particular version and market rather than treated as identical across all vehicles. Does the VELOIRE exterior change the vehicle's performance? VELOIRE provides no powertrain modification. The exterior description also does not establish a measured change in acceleration, range, drag or downforce. The changes explained here concern exterior components, materials and visual proportions. Is the photographed carbon finish the standard specification? The irregular forged-carbon appearance shown here is an upgrade direction. Standard woven carbon is available in 1 × 1 plain or 2 × 2 twill, with gloss or matte finishing. The optional forged wheels and separately commissioned cabin are outside the standard exterior kit. Can the program be fitted to different 9X versions? The program supports lower-output derivatives as well as the high-output version used for its first specification. Exact fitment is confirmed against the VIN, vehicle variant and sales market. Camera and sensor layouts used by higher- and lower-output versions have been tested, but that does not replace a vehicle-specific fitment check. Professional installation is recommended.
Silver BMW M4 G82 with REVOZPORT Race aero entering a closed-circuit corner
REVOZPORTtechnical

October 27, 2026

Trail Braking Technique Explained for Track Driving

Trail braking is the gradual release of brake pressure while steering into a corner. The main slowdown starts on the straight; as cornering demand builds, braking demand usually needs to fall. Done well, this transition can help manage corner-entry balance and prepare the car for a clean exit. It does not mean carrying heavy braking into every turn. This guide explains the trail braking technique for cars on a closed course, with qualified instruction. The useful question is how the car responds as you release the pedal. A later braking point or a longer brake trace is not automatically an improvement. What Is Trail Braking in a Car Imagine approaching a right-hand corner after a straight. You first reduce speed with the car largely straight. As you start turning, you progressively ease off the brake instead of releasing it all at once. That overlap between declining brake pressure and increasing steering is trail braking. Coaches sometimes use the term differently. Some include almost any controlled brake release after turn-in; others reserve it for carrying light braking farther into the entry. Neither description creates a universal release point. What matters is whether the overlap suits the corner and keeps the car predictable. It also differs from simply braking too late. If the entry speed already demands more grip than the tires can provide, holding the brake into the turn will not create the missing capacity. Learn a consistent straight-line approach before adding overlap. How Tire Grip and Load Transfer Shape the Release A tire has a limited capacity to generate braking and cornering forces together. The friction circle is a useful teaching model: asking for more lateral force leaves less room for longitudinal braking force. Real tires and changing surfaces are more complicated than a perfect circle, but the practical relationship remains useful. The red and blue arrows represent longitudinal and lateral demand. They are not measured force values. This is why turning the wheel farther while maintaining the same heavy brake input can overwhelm the front tires. Additional steering is not a substitute for available grip. The Northeast Region Porsche Club of America explains this relationship in its driving terminology guide. Braking also shifts vertical load toward the front axle and away from the rear. This changes the balance between the axles; it does not increase every tire's grip equally. For the underlying mechanism, see our guide to weight transfer in cars. Keeping some braking into turn-in can influence rotation. Too much can leave the front tires overloaded by combined demands or make the rear less stable. The release must respond to both effects. Smoothness means controlling how the load changes, rather than making every pedal movement slow. Under braking, vertical load increases at the front and decreases at the rear. Arrow sizes are conceptual, not a load distribution measurement. Trail Braking vs Threshold Braking and Straight Line Braking These terms describe different aspects of braking. Threshold braking concerns how close braking gets to the available tire-grip limit. Straight-line braking describes the car's direction. Trail braking describes the release and its overlap with turning. Technique Main purpose Relationship to steering Straight-line braking Reduce speed before turning Main braking takes place with the car largely straight Threshold braking Use braking grip near its limit while retaining control Usually taught first on the straight; the limit changes with conditions Trail braking Blend brake release into corner entry Braking demand generally falls as cornering demand increases A driver can use strong straight-line braking, potentially near threshold, then trail off during turn-in. A beginner does not need to reach the limit to learn a controlled release. Equally, finishing braking before turning can be the appropriate approach when it provides a stable, repeatable line. How to Practice the Trail Braking Technique on Track Work with an instructor at an organized track event. The sequence below is a framework for discussion and coached practice, not a pressure prescription. Keep the vehicle's normal safety systems in the configuration recommended by its manufacturer and the event instructor. 1 Establish a Repeatable Approach Choose a suitable corner with your instructor. Use an identifiable braking reference and a conservative entry speed. Establish your intended line and complete the main slowdown before adding significant steering. If the braking point, speed, and line change every lap, it becomes difficult to judge the effect of release. 2 Blend the Release Into Turn In As the steering input builds, reduce brake pressure progressively. Avoid stepping off the pedal or holding a large brake input simply because you have begun the exercise. Your instructor should help you connect pedal movement with the car's direction and stability. The approach, turn-in, and later entry form one continuous transition. These positions do not mark fixed braking or release points. 3 Adapt to the Corner and the Car Do not aim for a universal remaining brake percentage. Pedal travel, measured hydraulic pressure, and a simulator's normalized brake input are different signals. A value copied from another car may describe a different braking force altogether. Likewise, the apex is not a mandatory deadline. Depending on the line and available grip, braking may finish earlier or extend farther into the entry. Toyota GAZOO Racing's Episode 3 Trail Braking illustrates one teaching approach; its timing and proportions should not become rules for every vehicle. 4 Prepare a Controlled Transition to Throttle Release the brake as the car reaches the balance and direction needed for the next phase. Add throttle progressively when the car and line are ready. If a more aggressive entry leaves you correcting the steering or waiting longer to accelerate, the apparent entry gain may cost time down the following straight. After the lap, discuss one observation before changing another input. Was the entry line more consistent? Did the rear remain settled? Could you start unwinding the steering without a correction? These questions are more useful than trying to maximize how long the brake stays on. When to Use Trail Braking and When to Simplify Slow, tight corners can provide a reason to explore controlled entry rotation. Toyota's track guidance identifies slower bends as a useful application. That does not mean every hairpin needs deep trail braking: the approach, surface, car balance, and exit still decide whether it helps. A tight hairpin and a broad sweeper present different entry tasks. Corner shape alone does not determine a safe speed or brake release. For an unfamiliar fast corner, a wet or uneven surface, or a rear end that already feels unstable, simplify the entry and seek instruction. Combining more demands under those conditions leaves less room for mistakes. Do not force brake overlap to match a video of a different car. On cars with meaningful aerodynamic downforce, available grip can also change as speed falls. A braking profile from a high-downforce race car cannot simply be transferred to a road car. Our street aero vs track aero guide explains the different design priorities. Neither aero hardware nor brake technique removes the need to manage entry speed. Can Trail Braking Fix Understeer or Make You Faster It may improve lap time when a cleaner entry enables an earlier, better-controlled exit, but that benefit must be checked across comparable laps. Gaining time at turn-in is of little value if the exit loses more. It may help a particular corner-entry balance problem, but it cannot reliably cure understeer. A car that runs wide while turning may already be asking too much of the front tires. More brake or steering can increase that demand. An unloaded rear axle can also rotate farther than intended. First identify what is happening and when. Our understeer vs oversteer guide helps distinguish the two responses. Persistent instability deserves investigation of tires, alignment, brakes, suspension, and driver inputs rather than an increasingly aggressive entry. Keep changes traceable. If you alter damping, tire pressures, and brake release together, you lose a useful comparison. Our coilover track setup guide describes a methodical testing approach. Judge the result across entry, exit, and repeatability, not one impressive braking moment. What Telemetry Can Tell You Use data to test a specific question: did the release become more controlled without compromising the line or exit? Virtual Racing School's braking technique lesson provides simulator examples of release phases and speed-dependent grip. Those examples explain relationships; they are not targets for every real car. Brake signal: Look for the release shape and any unexpected reapplication. Check whether the channel measures pedal position or actual pressure. Steering and speed: Compare them at the same track positions. Check whether similar entries require similar inputs. Vehicle response: Match the trace with video, instructor feedback, and any available stability or rotation information. Exit and repetition: Check the following acceleration phase and several comparable laps, rather than selecting one isolated trace. Review data alongside driver observations and coaching. A smooth-looking trace alone does not establish that the entry was better. A drop in brake pressure without much steering could reflect a different line or reduced grip. Repeated brake applications could reflect traffic, a mistaken entry speed, or an intentional adjustment. Ask what happened before deciding what to change. Can Trail Braking Save an Overly Fast Road Corner Entry It cannot guarantee crash avoidance, and this track exercise should not be treated as an emergency recovery method. Public-road curves can hide traffic, debris, changing grip, and a tightening radius. There may be no runoff or space to correct a mistake. The Pennsylvania driver's manual advises drivers to reduce speed before entering a curve. Choose a speed appropriate to visibility and conditions before turning. Follow local driving guidance and the vehicle manual; do not practice performance-driving overlap on public roads. Common Trail Braking Mistakes Moving the braking point first: Learn the release from a consistent, conservative approach before asking an instructor about later braking. Holding heavy pressure as steering builds: Overlap requires managing combined demand, not maintaining the straight-line input. Releasing abruptly: A sudden pedal change can disturb the transition you are trying to control. Forcing the brake to the apex: A geometric reference does not determine the right release point for every car. Using technique to mask a problem: Stop chasing rotation when the vehicle's behavior or mechanical condition needs investigation. Frequently Asked Questions Do You Need to Trail Brake in Every Corner No. Use it only where the entry task, available grip, vehicle balance, and your skill make it appropriate. A simpler entry can provide a better result. Can Trail Braking Cause Oversteer Yes. Braking while turning can reduce rear stability, particularly with excessive pressure or abrupt inputs. The effect depends on the car and conditions. Does ABS Make Trail Braking Safe ABS helps manage wheel lock; it does not remove tire-grip limits or guarantee the intended cornering path. Follow the vehicle's guidance and learn with an instructor. Is Left Foot Braking Required No. Trail braking describes the brake-release pattern, not which foot operates the pedal. Learn with the pedal technique appropriate to the car and your instruction. Technical Sources Northeast Region Porsche Club of America Driving Terminology — combined grip, threshold braking, and trail braking terminology. Toyota Australia GAZOO Racing Episode 3 Trail Braking — track-focused balance and slow-corner examples. Its numerical teaching examples are not used as universal targets here. Virtual Racing School Fundamentals Braking Technique — simulator examples of release phases and downforce-related changes. Pennsylvania Driver Manual Negotiating Curves — public-road approach speed guidance.